Easy Homemade Sweetened Condensed Milk: Your 2-Ingredient Kitchen Game-Changer
Imagine whipping up a creamy, rich, and utterly delicious batch of sweetened condensed milk right in your own kitchen with just two simple ingredients. Not only is it incredibly easy, but this
homemade sweetened condensed milk recipe is also significantly cheaper than store-bought cans and offers a fresher, more personalized flavor. Forget artificial additives or unknown components; with this DIY approach, you're in complete control, transforming basic milk and sugar into a versatile culinary staple that will elevate your desserts, beverages, and breakfasts.
Why Choose Homemade Sweetened Condensed Milk? Beyond the Can!
For generations, canned sweetened condensed milk has been a pantry hero, a reliable shortcut to delectable treats. However, making your own offers compelling advantages that quickly make it the preferred choice for many home cooks:
- Unbeatable Value: The most immediate benefit is cost. Milk and sugar are staples, often much more affordable than a specialty canned product, especially when you consider the quantity you can make.
- Superior Flavor & Freshness: Store-bought condensed milk can sometimes carry a slightly metallic or overly sweet note. Homemade versions, made with less heat and fresh ingredients, boast a lighter, cleaner, and more nuanced flavor profile. It allows the natural dairy notes to shine, as noted by chefs who prefer homemade for recipes like butternut pumpkin pie where its fresh taste truly excels.
- Ingredient Control: When you make your own, you dictate what goes in. You can choose your preferred type of milk (full-fat for richness is often recommended), adjust the sugar level to your taste, and even explore organic options. This contrasts sharply with many commercial recipes that might include stabilizers or nonfat dry milk powder.
- Customization Opportunities: This is where the fun truly begins! While the basic recipe is just milk and sugar, you can infuse your batch with a variety of flavors. A dash of vanilla extract, a pinch of cinnamon or nutmeg, a swirl of cocoa powder for a chocolate version, or even a hint of cardamom can transform your condensed milk into something truly unique. This personalization is a game-changer for specific recipes or just for adding a special touch to your morning coffee. For more creative ideas, check out our article on Customize Your Sweetened Condensed Milk: Fresher, Tastier DIY Recipe.
- Easy Accessibility: You likely already have the ingredients in your kitchen right now, eliminating the need for a special trip to the grocery store.
What Exactly Is Sweetened Condensed Milk? A Brief History and Purpose
At its core, sweetened condensed milk is precisely what its name implies: milk that has been *condensed* by removing most of its water content through heat, and *sweetened* with a significant amount of sugar. The result is a thick, gooey, incredibly sweet, and shelf-stable product. Without the added sugar, it would simply be evaporated milk. The sugar isn't just for sweetness; it plays a critical role in preservation, inhibiting the growth of microorganisms and allowing condensed milk to last much longer than fresh milk.
The invention of condensed milk was born out of necessity in an era predating widespread refrigeration. In the 1850s, Gail Borden Jr. witnessed a tragic incident where cows became sick and died during an ocean voyage, leading to illness among children who consumed their milk. This experience ignited his passion to find a method for preserving milk safely. Inspired by the Shaker community's use of vacuum evaporation, Borden developed a successful technique and, in 1858, launched the New York Condensed Milk Company, establishing the now-iconic Eagle Brand. This innovation revolutionized dairy consumption, making milk safe and accessible across distances and over time.
This preservation method proved particularly impactful in regions like Southeast Asia, where, as my parents recall from their childhoods in Cambodia, refrigeration was scarce and most cows were used for labor rather than milk production. Sweetened condensed milk became a ubiquitous staple, used not only as a coffee creamer – a tradition I continue to enjoy as an adult, especially in strong iced coffees when traveling through the region – but also, interestingly, diluted with water to feed babies. To delve deeper into its fascinating journey, read our article
Beyond the Can: The History and Benefits of Homemade Sweetened Condensed Milk.
My own memories of condensed milk are deeply intertwined with family. Growing up, there was always a can in the cupboard. I fondly remember my dad drizzling thick, creamy condensed milk over warm slices of baguette for us, while he'd add a generous dollop to his chicory coffee. Now, as a parent myself, it's a comforting ritual I've inherited and share, a simple pleasure that connects generations.
The Simple Homemade Sweetened Condensed Milk Recipe: 2 Ingredients, Endless Possibilities
Ready to make your own? This
homemade sweetened condensed milk recipe is astonishingly straightforward and requires minimal fuss.
Yields: Approximately 1.5 cups (equivalent to one 14-oz can)
Prep time: 2 minutes
Cook time: 30-45 minutes
Ingredients:
- 3 cups (720ml) whole milk (full-fat is recommended for the best creamy texture)
- 1 cup (200g) granulated sugar
- Optional: 1 teaspoon vanilla extract (added after cooking)
Equipment:
- A heavy-bottomed saucepan (preferably wide for faster evaporation)
- Whisk
- Heatproof jar or airtight container for storage
Instructions:
- Combine Ingredients: In your heavy-bottomed saucepan, combine the whole milk and granulated sugar.
- Dissolve Sugar: Place the saucepan over medium heat, whisking constantly until the sugar completely dissolves. Do not let it boil yet.
- Bring to a Simmer: Once the sugar is dissolved, increase the heat slightly and bring the mixture to a gentle simmer. You’ll see small bubbles forming around the edges.
- Reduce Heat & Simmer: Immediately reduce the heat to low, maintaining a gentle simmer. The key here is patience. You want the milk to reduce and thicken slowly without scorching.
- Cook & Stir: Continue to simmer, stirring frequently – about every 5-10 minutes – to prevent the milk from sticking to the bottom and burning. As it cooks, the volume will decrease, and the color will deepen slightly to an off-white or light cream. The process typically takes 30 to 45 minutes, sometimes longer depending on your stove and pan.
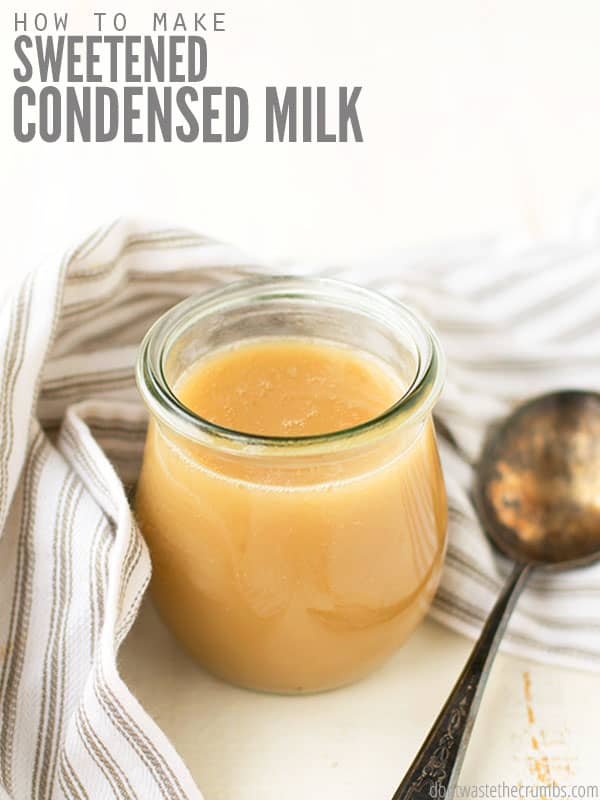
- Check for Thickness: Your condensed milk is ready when it has reduced by about half to one-third of its original volume and coats the back of a spoon. Remember, it will thicken significantly more as it cools, so don't let it get *too* thick on the stove. If it seems slightly thinner than you expect, that's often perfect.
- Cool & Store: Remove the saucepan from the heat. If using, stir in the vanilla extract now. Pour the homemade sweetened condensed milk into a clean, heatproof jar or airtight container. Let it cool completely to room temperature before covering and refrigerating.
Tips for Success:
- Use a Wide Pan: A wider saucepan increases the surface area, allowing the water to evaporate more quickly and reducing your cooking time.
- Don't Rush It: Low and slow is the mantra for perfect condensed milk. High heat will cause it to scorch and acquire an unpleasant taste.
- Stir, Stir, Stir: Especially in the later stages, frequent stirring is crucial to prevent burning on the bottom of the pan and milk solids from forming on the surface.
- Scrape the Sides: Periodically scrape down the sides of the pan with a rubber spatula to incorporate any milk solids that might cling there.
- Patience is Key: It might seem like it's taking a long time, but trust the process. The transformation happens gradually.
- Storage: Homemade sweetened condensed milk keeps well in an airtight container in the refrigerator for up to 3-4 weeks.
Endless Delicious Uses for Your Homemade Sweetened Condensed Milk
Now that you have a fresh batch, what can you do with it? The possibilities are truly endless!
- Coffee & Tea: Stir a spoonful into your morning coffee or tea for a rich, creamy sweetness, just like in your favorite cafe.
- Desserts Galore: It's a staple for no-bake cheesecakes, fudges, magic bars, tres leches cakes, key lime pies, and homemade ice creams.
- Breakfast Boost: Drizzle it over pancakes, waffles, French toast, or warm slices of bread for an indulgent start to your day.
- Fruity Delight: Use it as a sweet dip for fresh fruit like strawberries or mangoes.
- Smoothies: Add a touch to your fruit smoothies for extra creaminess and sweetness.
- Cocktails: Incorporate it into creative dessert cocktails for a luscious texture.
Conclusion
Making your own sweetened condensed milk at home is a rewarding experience that pays dividends in flavor, cost savings, and creative control. This simple
homemade sweetened condensed milk recipe, requiring just two ingredients and a bit of patience, yields a product far superior to its canned counterpart. From elevating your daily coffee to transforming ordinary desserts into extraordinary indulgences, embracing this DIY staple will undoubtedly become a favorite in your kitchen repertoire. So, skip the store-bought can, grab your milk and sugar, and prepare to be amazed by the delicious possibilities!